Monday, June 11, 2012

Washing red yarns and threads

I love the color red and so many of my thread crochet and even my yarn knitting includes red.  When I was young, (many, many years ago) red thread was color fast.  In the past 15 years I would not say that is true.  Nothing is more discouraging then getting a red and white piece done, washing it and having it bleed all over the white.

Here is another example of the red and white I love to use.
I always hand wash my crochet so that I can pin the shapes and just take the 'rumple' out of a piece I have been working on.

I have finally come up with a recipe for laundering reds that has not gone wrong on me yet.  I start with a bowl of cool filtered water.  I have a filter on my faucet.  Most city water has chlorine in it to kill the germs.  Unfortunately, it can also cause problems with letting reds bleed.  If I didn't have a filter I would set the water out on the counter over-night.  That would take care of the chlorine which will evaporate.

Next I add a small amount of laundry soap.  Now here is the magic ingredient:  white vinegar.  I add about a half cup or cup (depending on how big my bowl is) and stir it into the water.  Vinegar acts as a dye fixing agent.  It will help keep the red from bleeding.  I put the newly finished item into the water and let it soak overnight.  When I get up in the morning, everything is clean and the white is still white and not pink.  I allow it to dry in shape using pins if necessary or it can be ironed with a cloth over it to keep it from scourging.

This recipe has worked for me in the past.  If you know of another way to keep reds from bleeding, please let me know.  Since I love and use it so much I am always interested in other ideas.

Thursday, May 24, 2012

Tin Woodman of Oz and Father's Day

With Father's Day coming up, I finally finished the design for my Tin Woodman of Oz reading character bookmark pattern.  I always liked this character in the Wizard of Oz characters because he thought he needed a heart and he had the most heart of all the characters.  I think my own father may get one of these on Father's day.
Like all my reading Character bookmarks, his head hangs out of the book for ease of finding the reader's place.  His arms with his ax can go inside the book or hang outide as well.

This is a fairly simple pattern to make although the silver metallic thread usually isn't in stores until Christmas time.  I usually stock up when the metallic threads come out because I really like them.  I know that they can be found on line right now.  A gray or silver thread without the metallic fiber added would work also.

The pattern uses the usual stitches such as sc, hdc, dc, etc. (these are U.S. abbreviations) and some front and back posts work.   It also has picture tutorials on areas that might seem confusing without pictures.

I think fathers often are characterized as having no heart because they don't use the words "I love you" as often as mother's, but their actions tell it all.  At least this was the case of my own father and yet I know how much he loves me by all the ways he is ready to help if I need it.  

Happy Father's Day to all the "Tin Woodsman" out there. 

Tuesday, April 24, 2012

cowardly lion

March is supposed to be the month that comes in like a lion and goes out like a lamb.  April here in Kansas has turned into the lion.  Last week there were close to 100 tornadoes in this state.  Luckily no one in Kansas was hurt.  We have a great weather warning system and I think everyone was in their shelter.  Here is a picture of a tornado headed straight for us.

Luckily, it swerved and missed us.  All this weather has gotten me back into making more reading character bookmarks using the Wizard of Oz books as inspiration.  I just finished making the Cowardly Lion.  I really like how he came out.

All my reading character bookmark pals are made to have the head hang outside the book.  It makes it so much easier to find the page that way.  The head is very three-dimensional.


His front legs and his badge of courage which he got from the wizard of Oz can also hang outside the book.


I think the one thing the cowardly lion teaches me it that courage does not mean that I don't feel fear.  Instead I face that fear (usually with a lot of prayer) and do what needs to be done to overcome the obstacle.  It has been my experience that the fear of something is always bigger than the actual obstacle. 

The cowardly lion is now available at cowardly lion bookmark What a fun gift for any reader or graduate.

I am now starting on the tin man while I wait for this pattern to be tested so that other people who love to crochet as much as I do can make their own.

How is your April going?


Wednesday, March 14, 2012

Treasures of the Sea wrap

I have been really inspired by the hyperbolic crochet coral reefs that are being made around the world.  The work and colors are truely amazing and I decided to make a tiered wrap using some of these elements.

I started the wrap with a cream sea floor with little pearls scattered across.  I used a simple popcorn stitch which is just 5 double crochet in one stitch.  The hook is then removed, placed into the 1st of the 5 double crochet and then inserted back into the last lp.  These two are slip stitched together.

Next I wanted seaweed coming up from the floor.  After looking for different leaves that would look like seaweed. I came across the new crocodile stitch.  This piece is made separately and then attached to the sea floor.  It is a fairly easy stitch but I thought I would show how I made it as I made it a little different to suit the look I was going for.

Working off a foundation chain, I triple crocheted in the 4th chain from the hook.  Usually this stitch is done using double crochets across this row but I wanted a longer leaf.  Then I chained 1, skipped 2 chains, and made 2 triple crochet in next chain.  This pattern is continued across the foundation chain. Now here come the tricky part.

Instead of turning the piece over to work the next row, I rotated the piece 90 degrees and work back over the row of triple crochet groups of the last row on the same side.  Chain 2 and working over the 1st side post of the last triple crochet I worked 8 double crochet over the post.  Usually when doing this stitch on a double crochet, 5 double crochet are worked over this post.
Now add a chain 1, rotate the piece 180 degrees and work 8 dc down 2nd side post of 2-tr group.  This is the first leaf.

Now slip stitch in between the next 2 triple crochet group.


Continue working this pattern across the entire row.  At the end of the row chain 4 and triple crochet in the 4th chain from hook to set up for the next row. Chain 1 and work 2 triple crochets in center of next seaweed leaf of last row. Ch 1 and work 2 triple crochets in between next 2 leafs of last row.  Work this pattern across and at the end chain 2, and again rotate the piece 90 degrees. 
 Working this row in side posts of 2-triple crochet group of the previous row,  make 8 double crochets up 1st triple crochet side post,. Chain 1, rotate the piece180 degrees and work 8 double crochets down 2nd side post of 2-triple crochet group.  Slip stitched in-between next 2-triple crochet groups. Work 8 double crochets up next 2-triple crochet group side post.  To secure the leaves down, slip stitch in back loop of the 3rd double crochets on 2 leaves the previous leaf section (see picture below). Then chain 1, rotate the piece 180 degrees and work 8 dc down 2nd side post of 2 tr group.  Work this pattern across.
Now I had my seaweed section which is attached to the sea floor.

The next layer is a sea shell layer and the final layer is the coral layer section.  Since this wrap does not work to tie to stay in place I created this darling sea horse pin to hold the wrap in place.

I know it is late in the season for wraps but sometimes when the inspiration hits, I just have to make it now.  I really like how it turned out.  What do you think?

The pattern comes in two sizes.  Here is the picture of the longer scarf in a different set of colors.

Friday, February 10, 2012

Making Nupps

I love 3 dimensional crochet.  I also love to knit especially when the weather is cold outside.  A few year's ago I disovered nupps in knitting and designed a heart wrap for Valentine's season.  These little "bobbles" in knitting add an extra dimension to the work but can be a real challenge.  Here is the easiest way I found to make these little jewels.


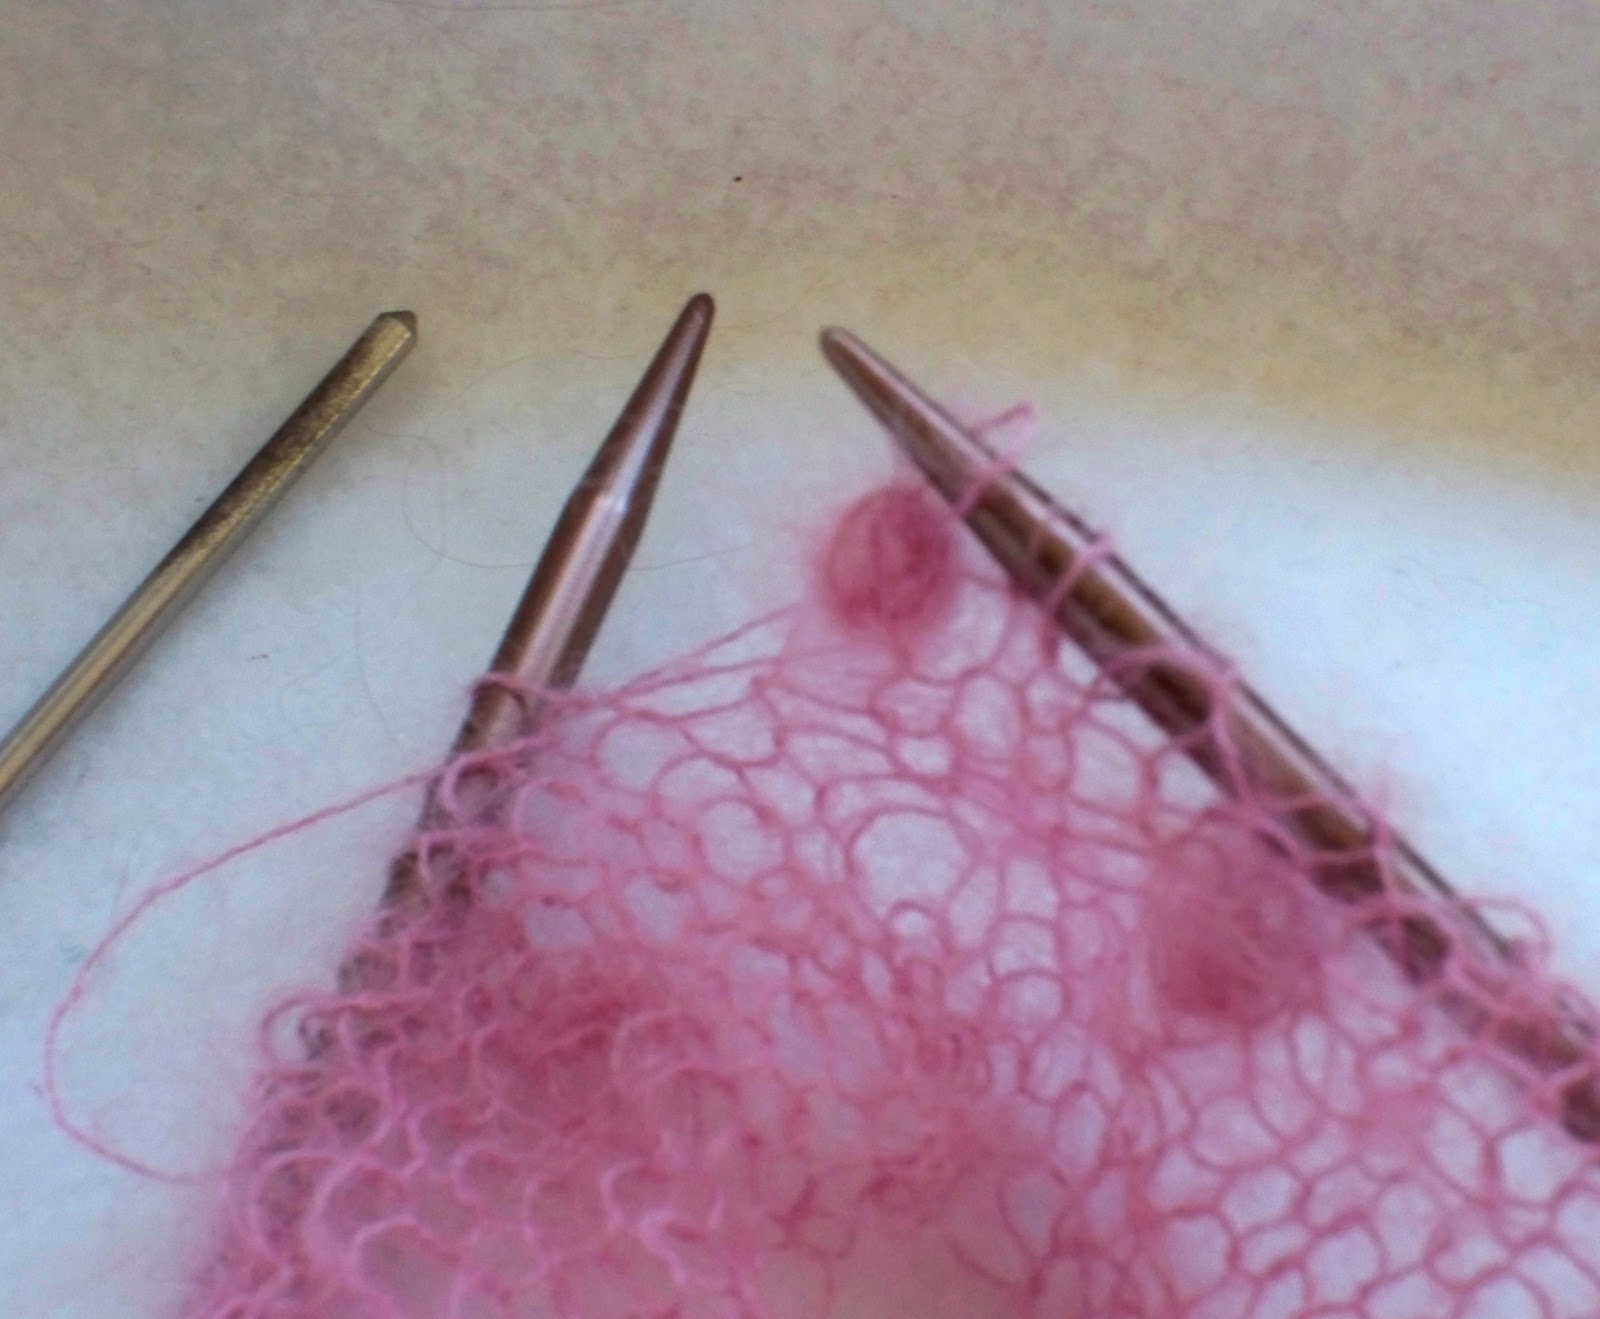
Nupps are made using two rows. On the first row (the knit row on a stockinette stitch) where a nupp is located is simply made doing a (knit, yarn over, knit, yarn over, knit, yarn over, knit) all in one stitch. The first and last stich is always a knit stich. They need to be as loosely made as possible, by pulling the yarn up.


In thicker yarn nupps usually are made by adding 5 to 7 extra stitches in this one stitch.  In really fine yarn they are usually made with 7 to 9 extra stitches in one stitch.  The pattern will usually tell you how many extra stitches to add.  Because this yarn is so fine, this pattern calls for 9 stitches in the one stitch.


The rest of the row is worked and the work is turned over for the second row.  (In a stockinette stitch, this is a purl row.)  In the second row all these extra stitches are purled together as one.   This is the hardest part of nupps and I found a great trick to making these.  Purl on the row until you come to the extra stitches.  Find a crochet hook that will work with your yarn.  Put all the nupp stitches on the crochet hook.


Yarn over with your working yarn and pull it through all these stitches.


Finally, place this one stitches back on your right hand needle and work across the rest of the row.


The other thing I learned to watch for on the purl row is to be careful not to purl the first few stitches of the nupp into the row as this will cause your stitch count to be off.  Using this method really made nupps a whole lot easier for me.  I really like the end result of that extra dimension to the design.

I hope everyone has a wonderful Valentine's day.


Tuesday, January 24, 2012

My newest inspiration

I have been seeing all sorts of Coral Reefs that are being made using crochet.  I believe this was all started by the Hyperbolic Crochet Coral Reef at the Smithsonian.  Here is the link to the project so that you can see what I am writing about.http://www.mnh.si.edu/exhibits/hreef/

It is truely inspiring to me.  For people who are on Ravelry, here is the link to a group on Ravelry that was working on the project.http://www.ravelry.com/groups/smithsonian-community-reef  There are some amazing pictures of completed projects by clicking on the recently shared projects on the right hand side of the page.  (If you haven't joined Ravelry yet, I would encourage any knitter, weaver or person loves to crochet to join.  It is free and so full of wonderful patterns and forums to get to know others the world over who share our love.)

The Crochet Coral Reefs are popping up all over the world. Here is another exhibit in the Putnam Museum in Iowa. http://www.putnam.org/reef.html  Do a google search for Hyperbolic Crochet Coral Reef and you will see that they are going everywhere.

I love the colors and textures.  In looking at all these wonderful pieces of art, I got an idea for a new design for a scarf.  So I had to head down to my local yarn store and see what I could find that would be soft and warm to wear and in the colors that I wanted.  This is probably one of my favorite parts of designing.

I found this angora and wool yarn by Classic Elite Lush yarn.
I also found this wonderful baby Alpaca yarn by Cascade Yarns.
Both yarns feel wonderful.  I have come up with part of the design and am just tweeking it so that it has just the look I am going for.

Does nature ever inspire you as they have me?

Wednesday, December 21, 2011

Christmas Nativities

Christmas Nativities are a big thing in my house.  What started out as a teaching tool for my children to teach them what our household believes Christmas is about, has become an obsession.  I have made many, many sets including some that don't get put out because they have been loved to death.  I thought I would share some of them here. 


I found this set in a series of magazines several years back and being a crocheter, I had to make it.


I bought this set from a local ceramic artist.  I just loved the simplicity of it.  Joseph is about 8 inches tall.  The pine cones are actually huge so I just had to put glitter on them.

 I love this set that I made years ago.  Joseph is only about 3 1/2 inches tall it is my smallest set.  My daughter in her youth made the counted cross stitch embroidery above it.


This is my newest set.  It is made with pom-pom balls, felt and different embellishments.  I love how it came out.

My main problem with all these nativities is I am running out of surfaces to put them on.  I would love to design a set one of these years but I need an idea that hasn't already been done.  There are so many wonderful patterns out there it is really hard to come up with something new.  The reality is it is a really old story that showed men just how much God loves each of us.

Do you have a favorite Nativity set that you set up at Christmas time?