Wednesday, March 14, 2012

Treasures of the Sea wrap

I have been really inspired by the hyperbolic crochet coral reefs that are being made around the world.  The work and colors are truely amazing and I decided to make a tiered wrap using some of these elements.

I started the wrap with a cream sea floor with little pearls scattered across.  I used a simple popcorn stitch which is just 5 double crochet in one stitch.  The hook is then removed, placed into the 1st of the 5 double crochet and then inserted back into the last lp.  These two are slip stitched together.

Next I wanted seaweed coming up from the floor.  After looking for different leaves that would look like seaweed. I came across the new crocodile stitch.  This piece is made separately and then attached to the sea floor.  It is a fairly easy stitch but I thought I would show how I made it as I made it a little different to suit the look I was going for.

Working off a foundation chain, I triple crocheted in the 4th chain from the hook.  Usually this stitch is done using double crochets across this row but I wanted a longer leaf.  Then I chained 1, skipped 2 chains, and made 2 triple crochet in next chain.  This pattern is continued across the foundation chain. Now here come the tricky part.

Instead of turning the piece over to work the next row, I rotated the piece 90 degrees and work back over the row of triple crochet groups of the last row on the same side.  Chain 2 and working over the 1st side post of the last triple crochet I worked 8 double crochet over the post.  Usually when doing this stitch on a double crochet, 5 double crochet are worked over this post.
Now add a chain 1, rotate the piece 180 degrees and work 8 dc down 2nd side post of 2-tr group.  This is the first leaf.

Now slip stitch in between the next 2 triple crochet group.


Continue working this pattern across the entire row.  At the end of the row chain 4 and triple crochet in the 4th chain from hook to set up for the next row. Chain 1 and work 2 triple crochets in center of next seaweed leaf of last row. Ch 1 and work 2 triple crochets in between next 2 leafs of last row.  Work this pattern across and at the end chain 2, and again rotate the piece 90 degrees. 
 Working this row in side posts of 2-triple crochet group of the previous row,  make 8 double crochets up 1st triple crochet side post,. Chain 1, rotate the piece180 degrees and work 8 double crochets down 2nd side post of 2-triple crochet group.  Slip stitched in-between next 2-triple crochet groups. Work 8 double crochets up next 2-triple crochet group side post.  To secure the leaves down, slip stitch in back loop of the 3rd double crochets on 2 leaves the previous leaf section (see picture below). Then chain 1, rotate the piece 180 degrees and work 8 dc down 2nd side post of 2 tr group.  Work this pattern across.
Now I had my seaweed section which is attached to the sea floor.

The next layer is a sea shell layer and the final layer is the coral layer section.  Since this wrap does not work to tie to stay in place I created this darling sea horse pin to hold the wrap in place.

I know it is late in the season for wraps but sometimes when the inspiration hits, I just have to make it now.  I really like how it turned out.  What do you think?

The pattern comes in two sizes.  Here is the picture of the longer scarf in a different set of colors.

Friday, February 10, 2012

Making Nupps

I love 3 dimensional crochet.  I also love to knit especially when the weather is cold outside.  A few year's ago I disovered nupps in knitting and designed a heart wrap for Valentine's season.  These little "bobbles" in knitting add an extra dimension to the work but can be a real challenge.  Here is the easiest way I found to make these little jewels.


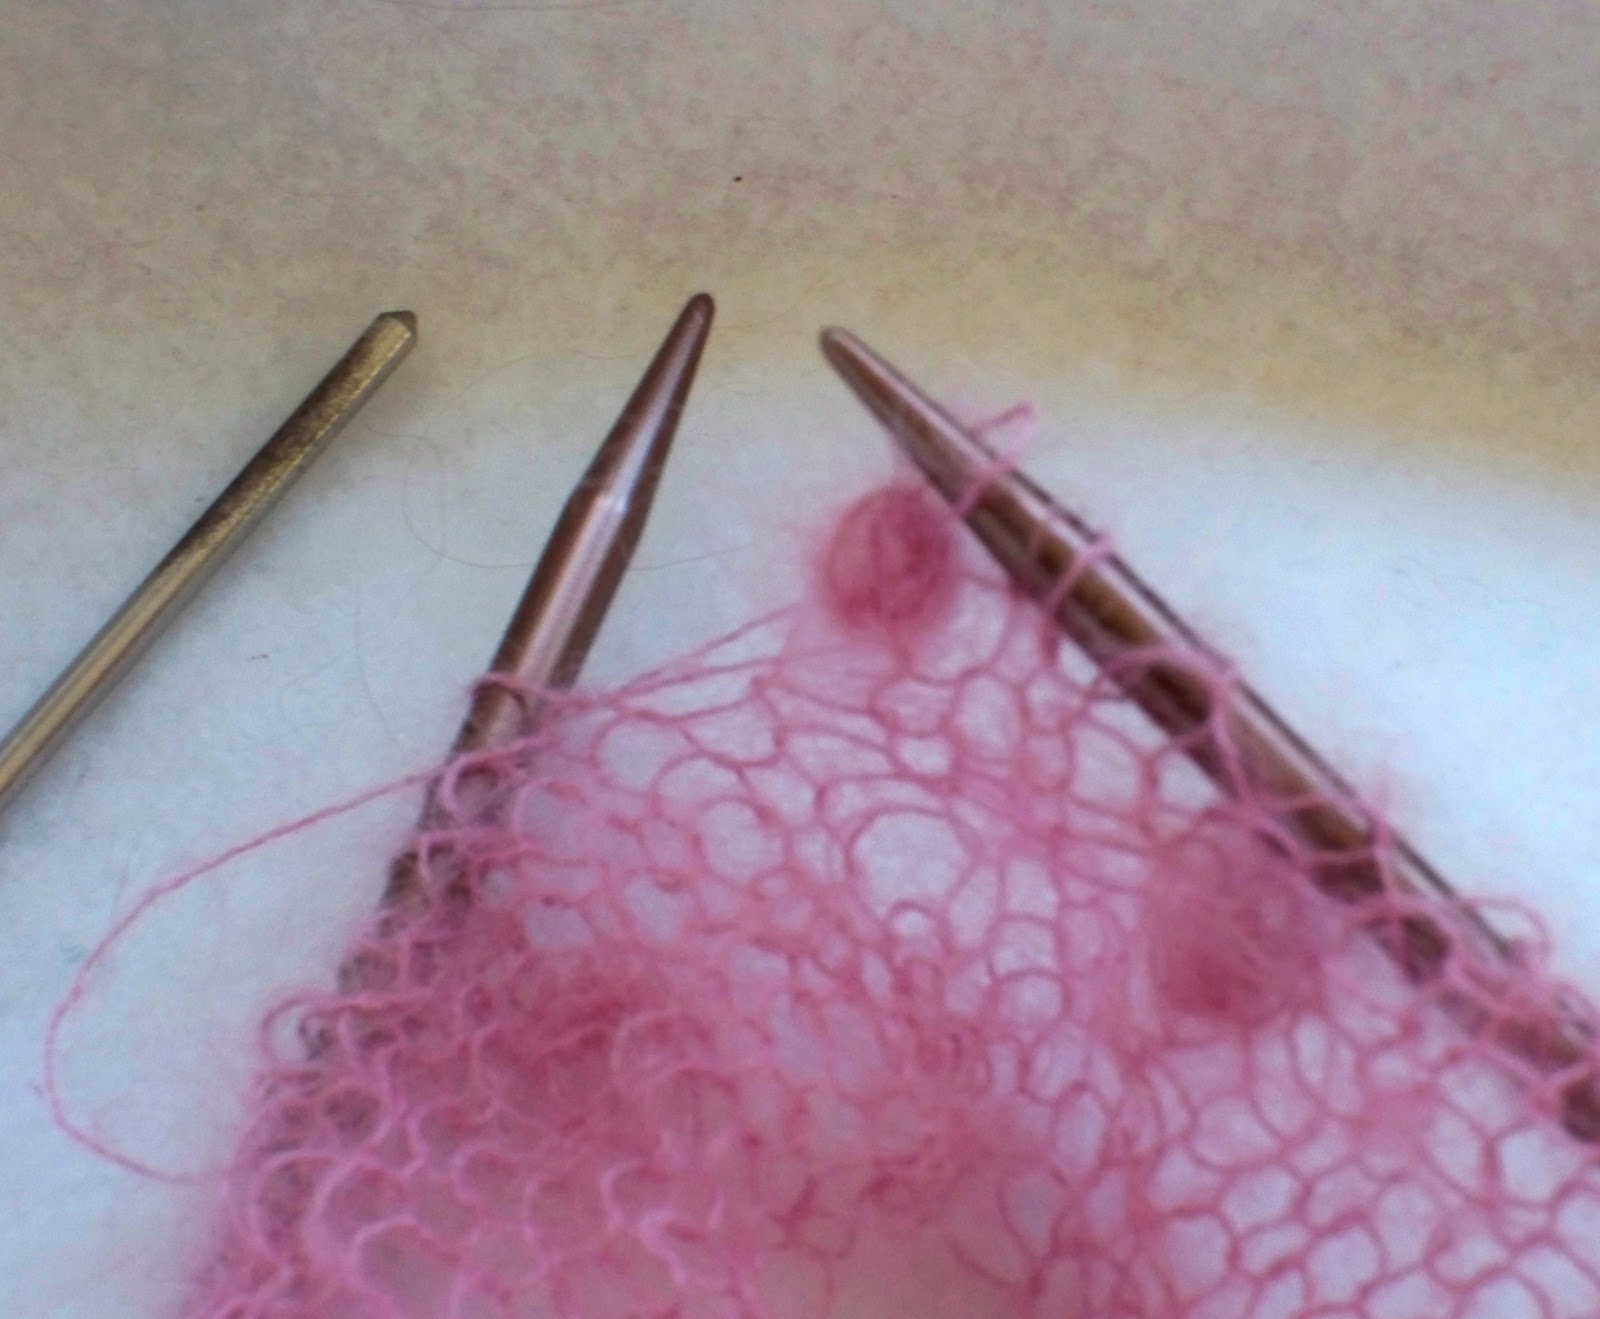
Nupps are made using two rows. On the first row (the knit row on a stockinette stitch) where a nupp is located is simply made doing a (knit, yarn over, knit, yarn over, knit, yarn over, knit) all in one stitch. The first and last stich is always a knit stich. They need to be as loosely made as possible, by pulling the yarn up.


In thicker yarn nupps usually are made by adding 5 to 7 extra stitches in this one stitch.  In really fine yarn they are usually made with 7 to 9 extra stitches in one stitch.  The pattern will usually tell you how many extra stitches to add.  Because this yarn is so fine, this pattern calls for 9 stitches in the one stitch.


The rest of the row is worked and the work is turned over for the second row.  (In a stockinette stitch, this is a purl row.)  In the second row all these extra stitches are purled together as one.   This is the hardest part of nupps and I found a great trick to making these.  Purl on the row until you come to the extra stitches.  Find a crochet hook that will work with your yarn.  Put all the nupp stitches on the crochet hook.


Yarn over with your working yarn and pull it through all these stitches.


Finally, place this one stitches back on your right hand needle and work across the rest of the row.


The other thing I learned to watch for on the purl row is to be careful not to purl the first few stitches of the nupp into the row as this will cause your stitch count to be off.  Using this method really made nupps a whole lot easier for me.  I really like the end result of that extra dimension to the design.

I hope everyone has a wonderful Valentine's day.


Tuesday, January 24, 2012

My newest inspiration

I have been seeing all sorts of Coral Reefs that are being made using crochet.  I believe this was all started by the Hyperbolic Crochet Coral Reef at the Smithsonian.  Here is the link to the project so that you can see what I am writing about.http://www.mnh.si.edu/exhibits/hreef/

It is truely inspiring to me.  For people who are on Ravelry, here is the link to a group on Ravelry that was working on the project.http://www.ravelry.com/groups/smithsonian-community-reef  There are some amazing pictures of completed projects by clicking on the recently shared projects on the right hand side of the page.  (If you haven't joined Ravelry yet, I would encourage any knitter, weaver or person loves to crochet to join.  It is free and so full of wonderful patterns and forums to get to know others the world over who share our love.)

The Crochet Coral Reefs are popping up all over the world. Here is another exhibit in the Putnam Museum in Iowa. http://www.putnam.org/reef.html  Do a google search for Hyperbolic Crochet Coral Reef and you will see that they are going everywhere.

I love the colors and textures.  In looking at all these wonderful pieces of art, I got an idea for a new design for a scarf.  So I had to head down to my local yarn store and see what I could find that would be soft and warm to wear and in the colors that I wanted.  This is probably one of my favorite parts of designing.

I found this angora and wool yarn by Classic Elite Lush yarn.
I also found this wonderful baby Alpaca yarn by Cascade Yarns.
Both yarns feel wonderful.  I have come up with part of the design and am just tweeking it so that it has just the look I am going for.

Does nature ever inspire you as they have me?

Wednesday, December 21, 2011

Christmas Nativities

Christmas Nativities are a big thing in my house.  What started out as a teaching tool for my children to teach them what our household believes Christmas is about, has become an obsession.  I have made many, many sets including some that don't get put out because they have been loved to death.  I thought I would share some of them here. 


I found this set in a series of magazines several years back and being a crocheter, I had to make it.


I bought this set from a local ceramic artist.  I just loved the simplicity of it.  Joseph is about 8 inches tall.  The pine cones are actually huge so I just had to put glitter on them.

 I love this set that I made years ago.  Joseph is only about 3 1/2 inches tall it is my smallest set.  My daughter in her youth made the counted cross stitch embroidery above it.


This is my newest set.  It is made with pom-pom balls, felt and different embellishments.  I love how it came out.

My main problem with all these nativities is I am running out of surfaces to put them on.  I would love to design a set one of these years but I need an idea that hasn't already been done.  There are so many wonderful patterns out there it is really hard to come up with something new.  The reality is it is a really old story that showed men just how much God loves each of us.

Do you have a favorite Nativity set that you set up at Christmas time?  


Saturday, December 10, 2011

Winter Tree Cable Men’s Fingerless Gloves

I love winter trees.  They are beautiful in the spring, summer and fall but in the winter against a winter sky you can see just what they have to stand against to make it.  Most of the trees out here like this Osage-Orange tree have a real bent to them to stand against the Kansas wind.

My husband asked me design some fingerless gloves for him.  Since lace knitting wouldn't work for a guy's design, I thought of cable.  In thinking about my husband, he often reminds me of a winter tree. He is steadfast and true and has weathered amazing storms in his life, and yet he stands.  I am sure that there were times in our marriage that it would have been easier to leave then withstand  the storms but because of his promise to God and me on our wedding day, he has chosen to stay and grow through it.  The character that is his because of his choices, has made him a truly amazing, loving man.

This is the design I came up with for his gloves.

 They were probably my hardest design to date because the broad part of the tree kept getting in the way of the thumb gusset.  I had to design each glove a little differently since the thumb gusset was on opposite sides, but I am really pleased with how they came out.  I used a soft acrylic yarn so that they would wash easily. He is really pleased with the design and how they fit his hand and that makes me really happy.

Here is a pair I made in a cotton thread.
I am pleased to say they work up in about 10 hours or less after I was able to get the design figured out.  They are worked in a worsted weight yarn and worked in the round so there are no irritating seams to be felt by the wearer.

Saturday, December 3, 2011

Christmas Time

Christmas is my favorite holiday.  I love the colors and all the lights on houses and trees.  What a wonderful way to celebrate the birth of Jesus.  I love decorating the Christmas tree and making Christmas tree decorations. 

This year, I decided to take a break from designing so that I could have time to wrap and mail packages, decorate the tree and do some baking.  I remember some pine cone shaped ornaments with gold or silver tips that were on my folk's tree when I was a child.  I wanted to get some for my tree.  I looked at all the decorations in the stores and couldn't find any anywhere.  So the option I came up with is make my own.  It turned out to be a very short break from designing.  I just don't seem to be able to help myself

I got all the deep colors of yarn and thread I have at home.  Of course, I had to pick up a few more when I was in the stores.  I got out all my metallic gold and silver threads and started working on making a pine cone shape. 

This is what I came up used a deep red light worst weight yarn and gold metallic thread.  I am using a shell stitch to come up with individual scales.  The metallic thread really sparkles on the tree.

Here it is in a deep blue and silver metallic thread.  Pine cones just seem to fit on Christmas trees. 
And again in purple and silver.  I often use real pine cones that I have glittered and glued to go around nativity scenes but they just don't show up on Christmas trees like these crochet ones do.  While I am waiting for my men's fingerless gloves to get back from the testers, I am having fun making crochet pine cones for my tree. 

Do you like to make Christmas ornaments for your tree?


Thursday, November 10, 2011

Trees and Men's Fingerless Gloves

The weather has been glorious this year and I have gotten some pictures of the trees in our area.  The bright yellow one is a cottonwood.  I love the feel of the air and the cooler temperatures.  We have even gotten rain this week which is almost always an event in this part of Kansas.  During this time of year, I am always wanting to knit.

When I was working on the Pine Tree and Cones Fingerless Gloves, my husband said he would love a men's pair as it would allow for warmth in the hands but dexterity and feel in the fingers.  I thought, "Why not.  That should be relatively simple."   If I had only known, I am not sure I would have started this project.

I love knitted lace but that wouldn't be something my husband would be interested in.  So I thought maybe some sort of cable design.  That seemed like more of a male design that I could get into.
I started looking through patterns to see if I could find something.  What I found is that just about every cable stitch I would come up with has already been done in fingerless gloves.  So then I thought I will just have to come up with a new cable design.  Silly me.

Also, he can wear his clothes pretty hard so I needed to find some yarn that would wear hard and be much thicker so that he would not snag the glove and break the threads.  So I went to our local yarn shop to look at what I could find that would wash easily and wear well. (I love doing this part of the design process.  I usually have to stop myself from buying out the store)  I thought worsted weight should be heavy enough to handle his hard use.   I found a light worsted weight in tan that should wash easily but was really soft next to the skin.  I also found some rust cotton that would work.  Both colors are good for him.

With the yarn colors and the cable design I set down to draw out different ideas.  I love trees of all seasons and I thought of the gnarly hedge rows around the wheat fields in our area.  In the winter with no leaves, these Osage-orange trees are really fantastic to see.  We appreciate their wood for burning in our fireplace as it burns hot for a long time.

With this in mind I set out to design a cable that would twist and divide into the branches that these trees do.  I have been working on this design for 2 + months and have been tempted to give up on it.  However, I hate to admit defeat and have had to take it out, try something else, take that out, try something else, etc.   I am excited because I think I have finally figured this design out.  I will be introducing this pattern for others to make in 2 or three weeks.

Have you ever had a project that you just refused to give up on?